BoozeBot: A DIY Cocktail-Making Machine
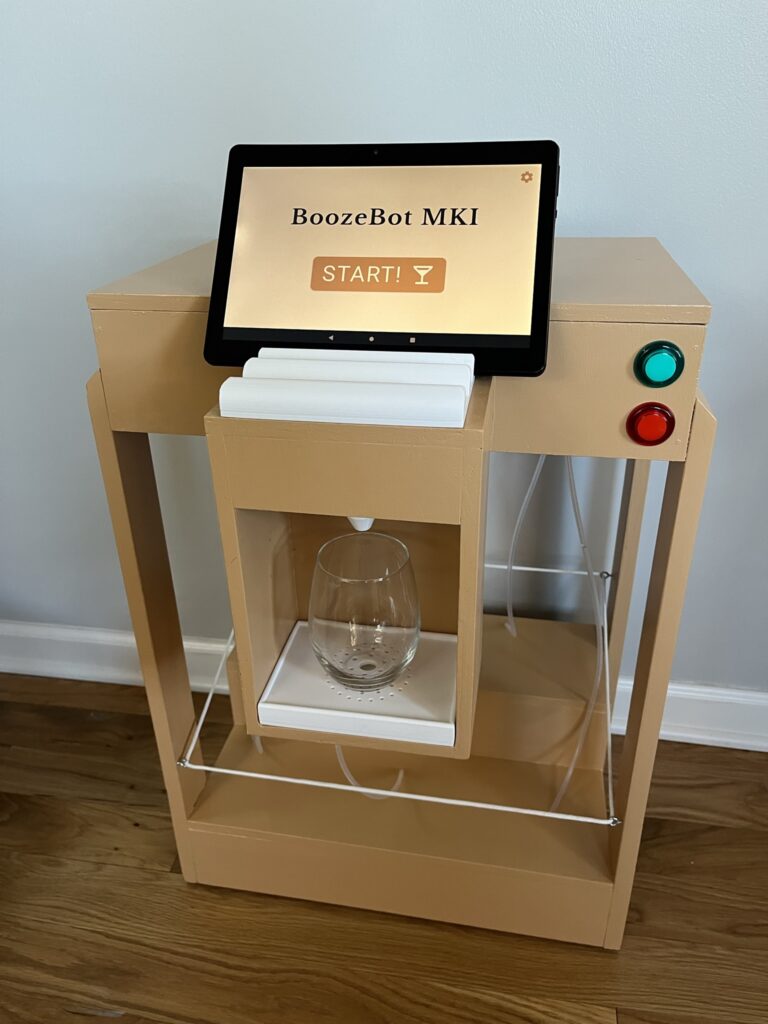
BoozeBot is a bartending, drink-mixing, cocktail-making robot! Load the machine with ingredients of your choice, select a cocktail from the list shown on the touchscreen, and watch as BoozeBot dispenses the right amount of each required ingredient into your glass.
[ Demo Video: COMING SOON ]
Six peristaltic pumps, controlled by an ESP32 microcontroller, are turned on and off at precise times to move ingredients directly from their bottles, out the dispenser nozzle, and into your glass via food-safe flexible tubing. The ESP module communicates with a cheap android tablet running a react-native app that displays the menu to the user. The app also allows for direct manual control of the pumps (which is useful for cleaning).
This project took a few weeks to design and about a month for my friend Micah and I to build in my garage. Total cost was around $200 for parts and materials. Overall, BoozeBot was a great summer project.


Overall Design and Parts List
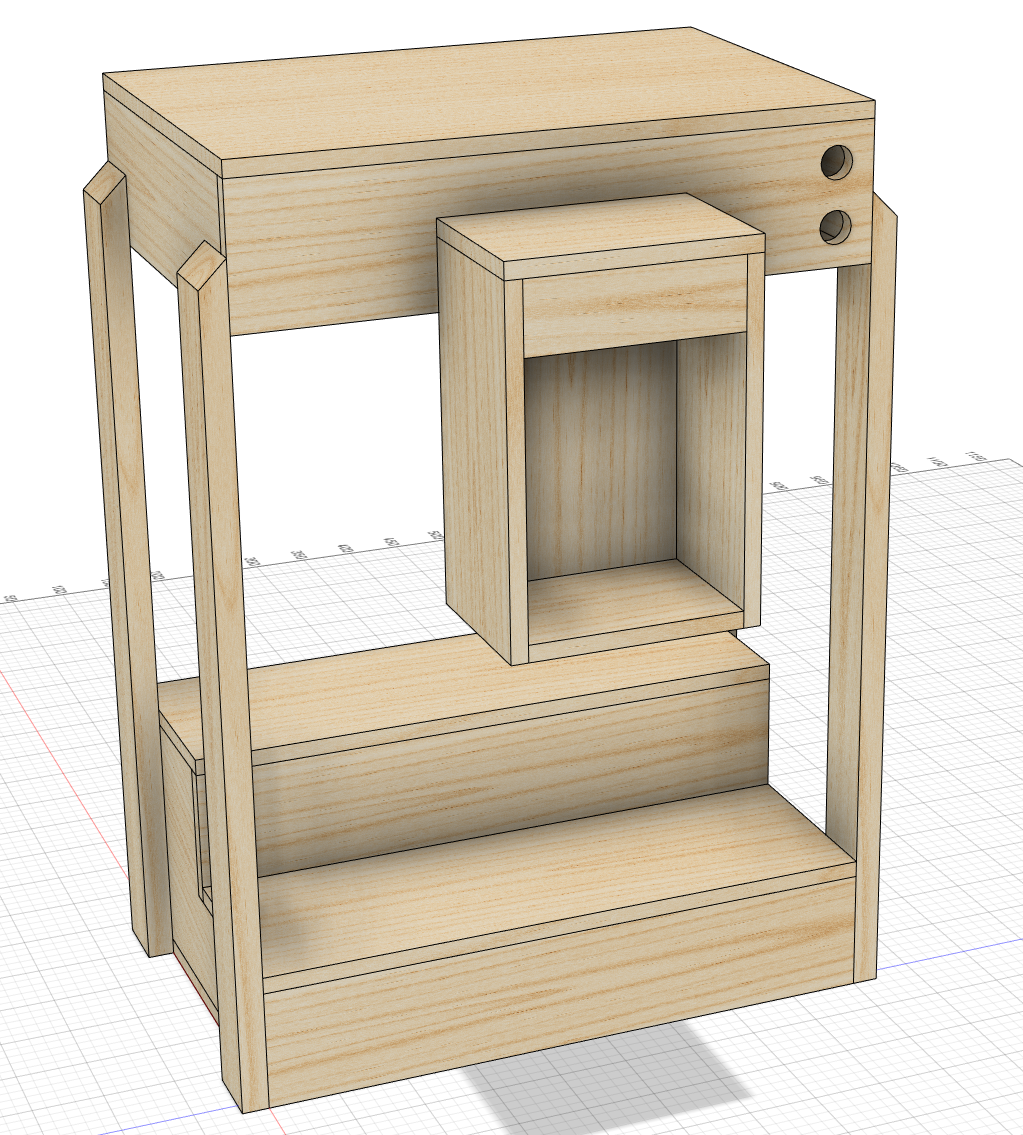
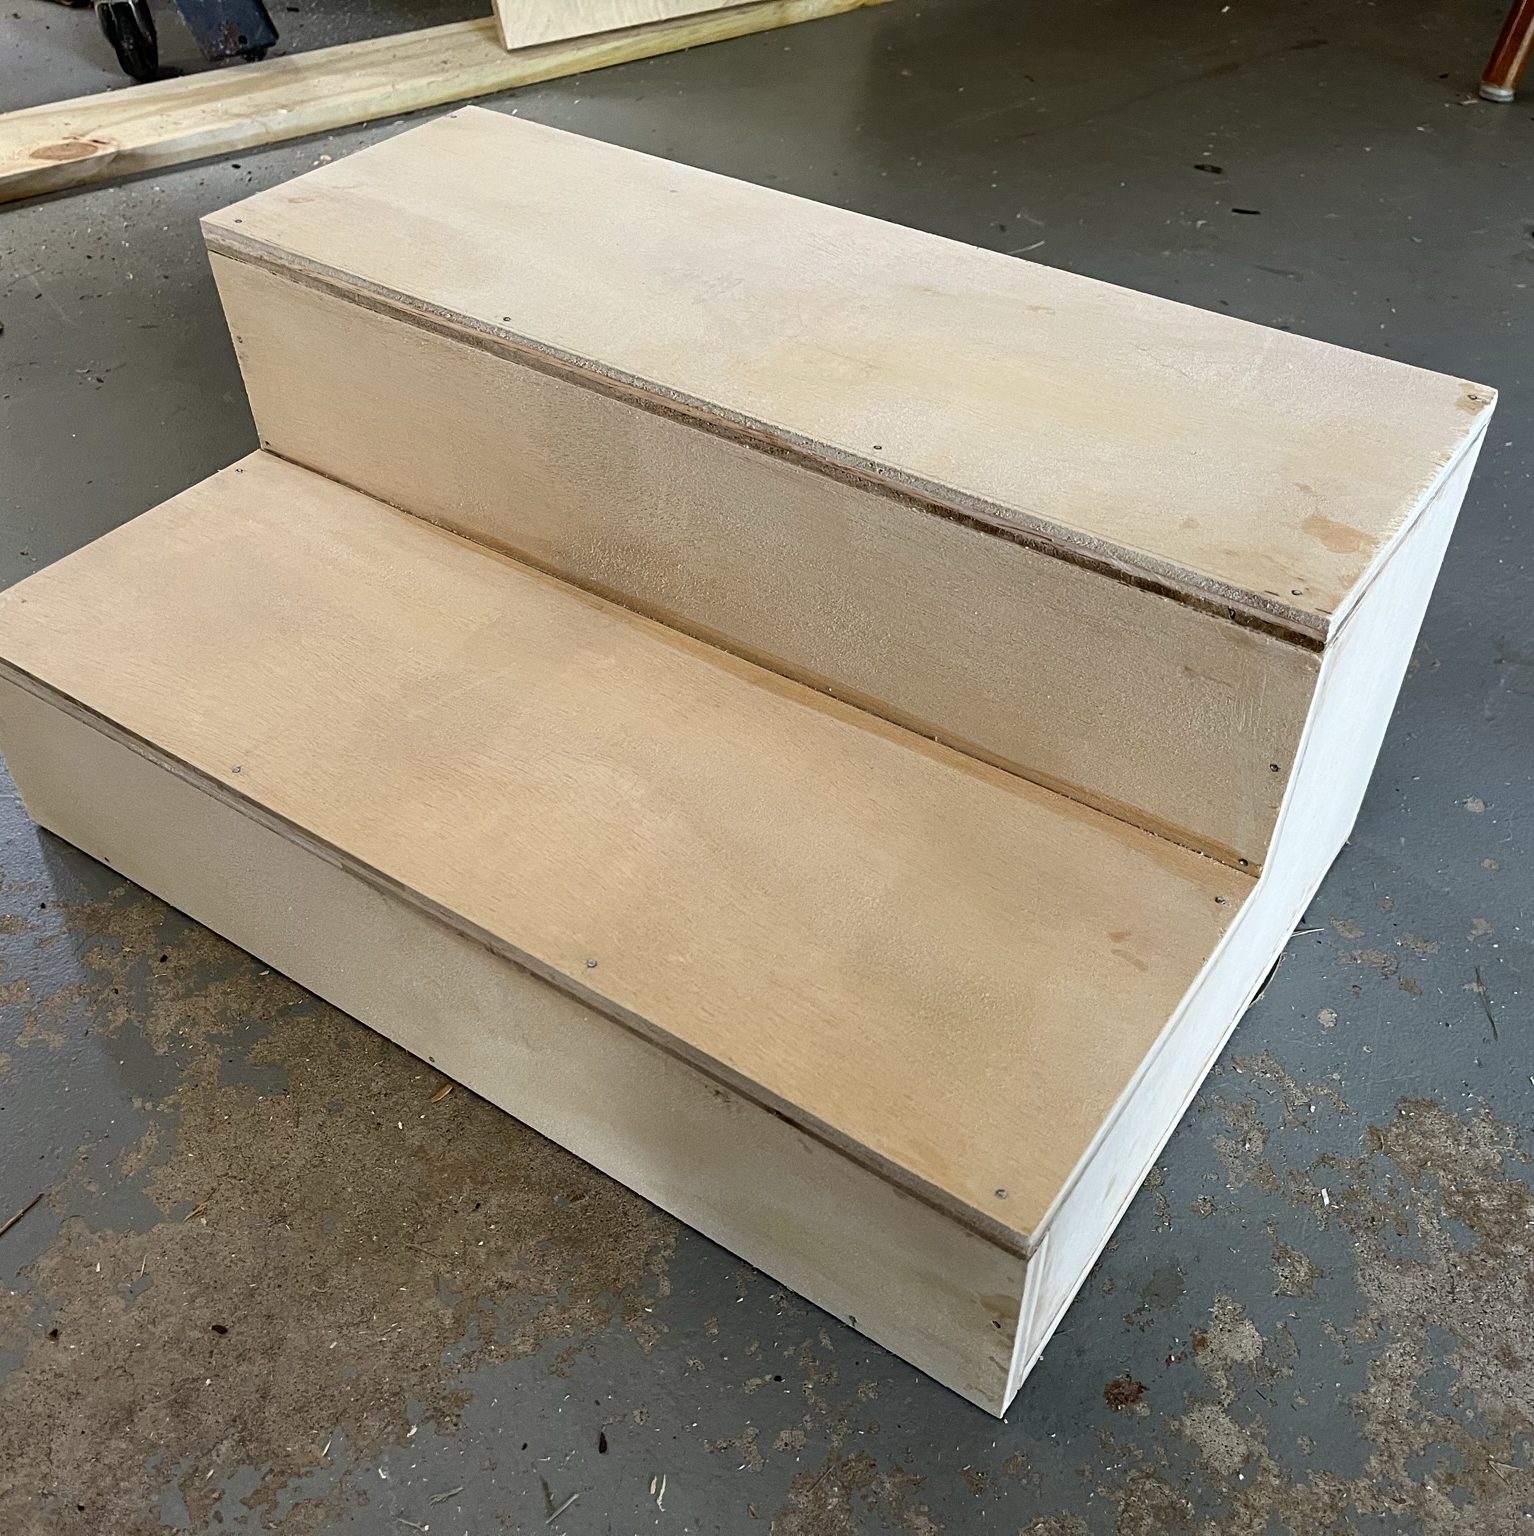
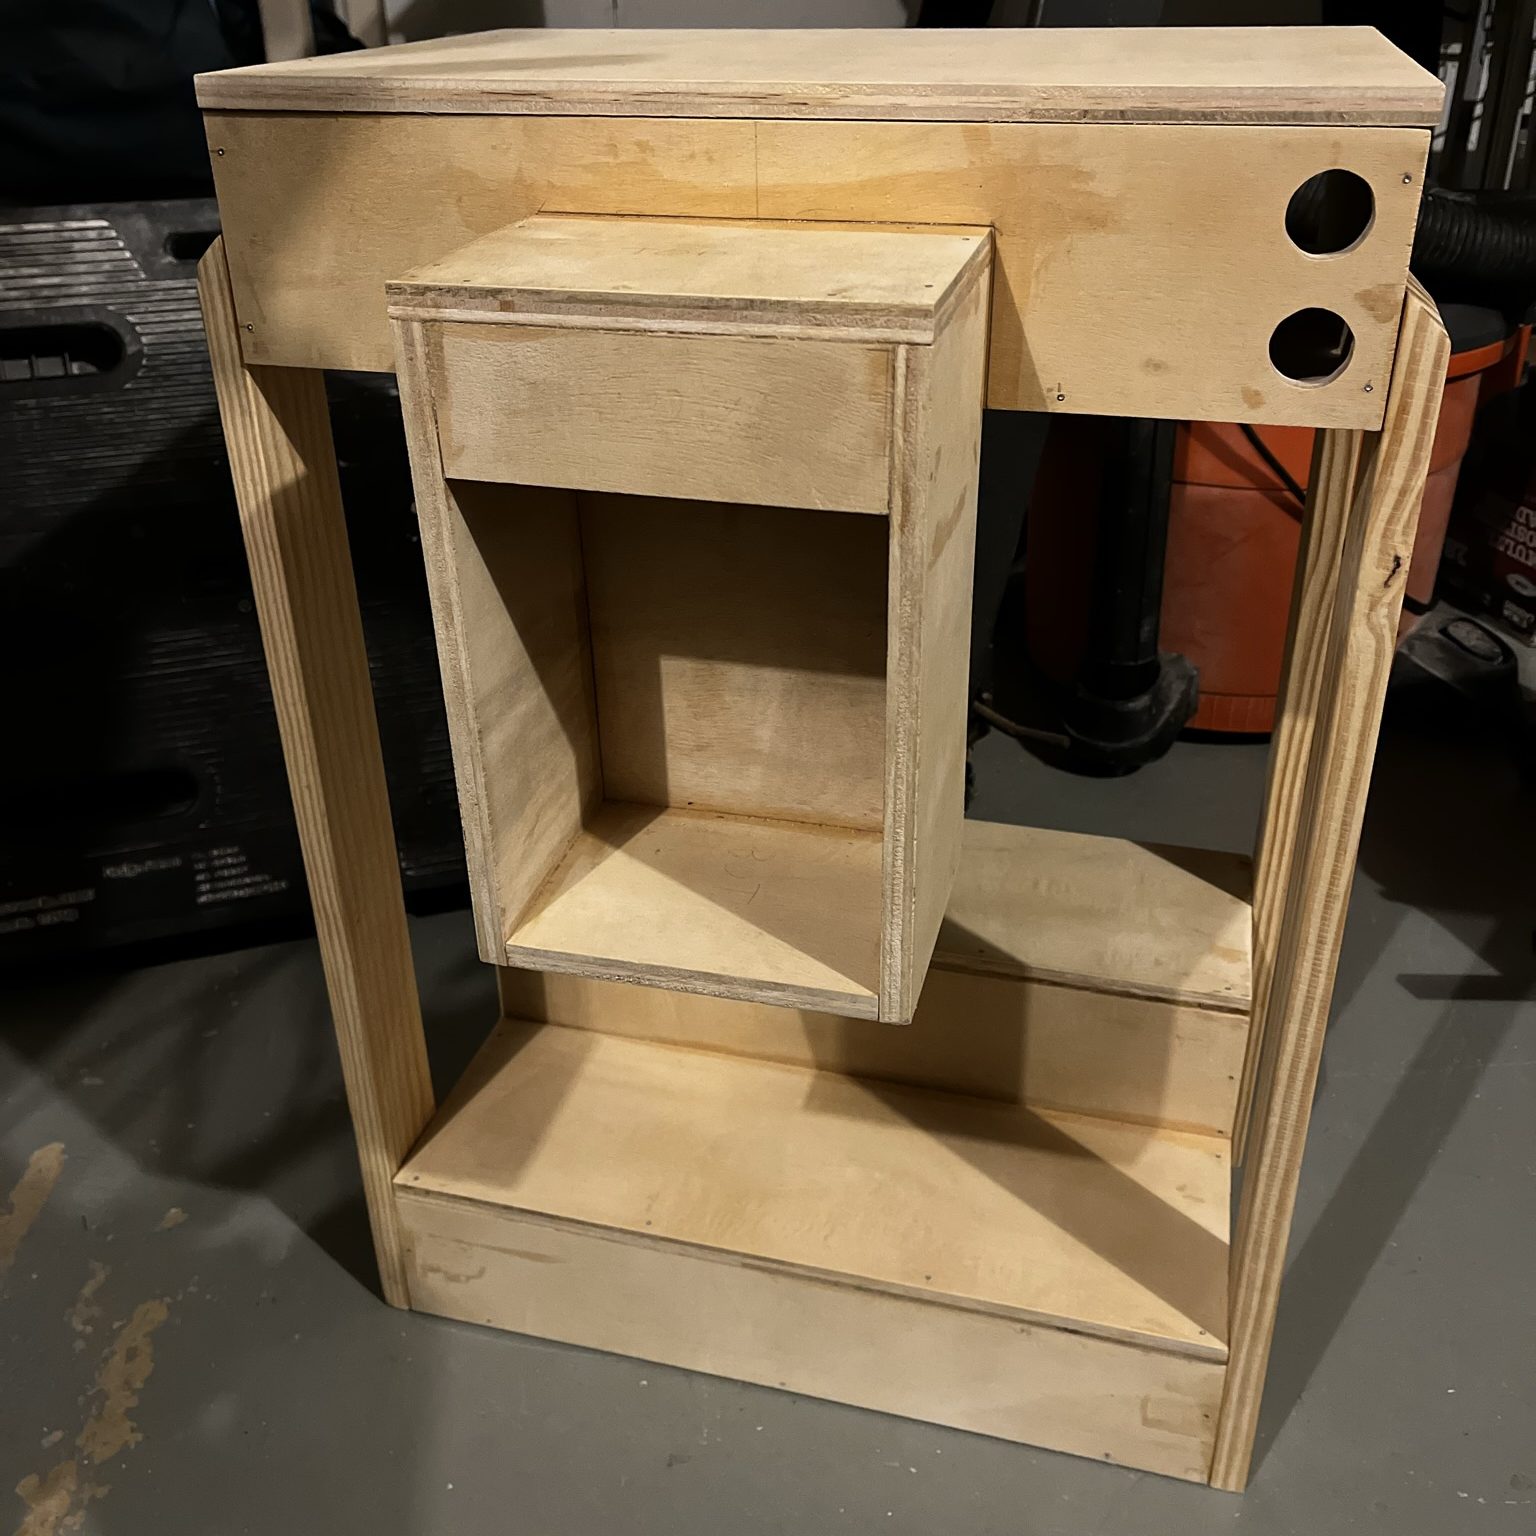
After making a couple of rough whiteboard sketches, I moved over to Fusion 360 to model the machine in full detail. The overall footprint is roughly 45cm x 30cm x 65cm. The tablet holder supports a few different angles, so the machine can be comfortably used either on the floor or on a table/counter. All electronics and pumps live in the head unit, which has a removable lid.
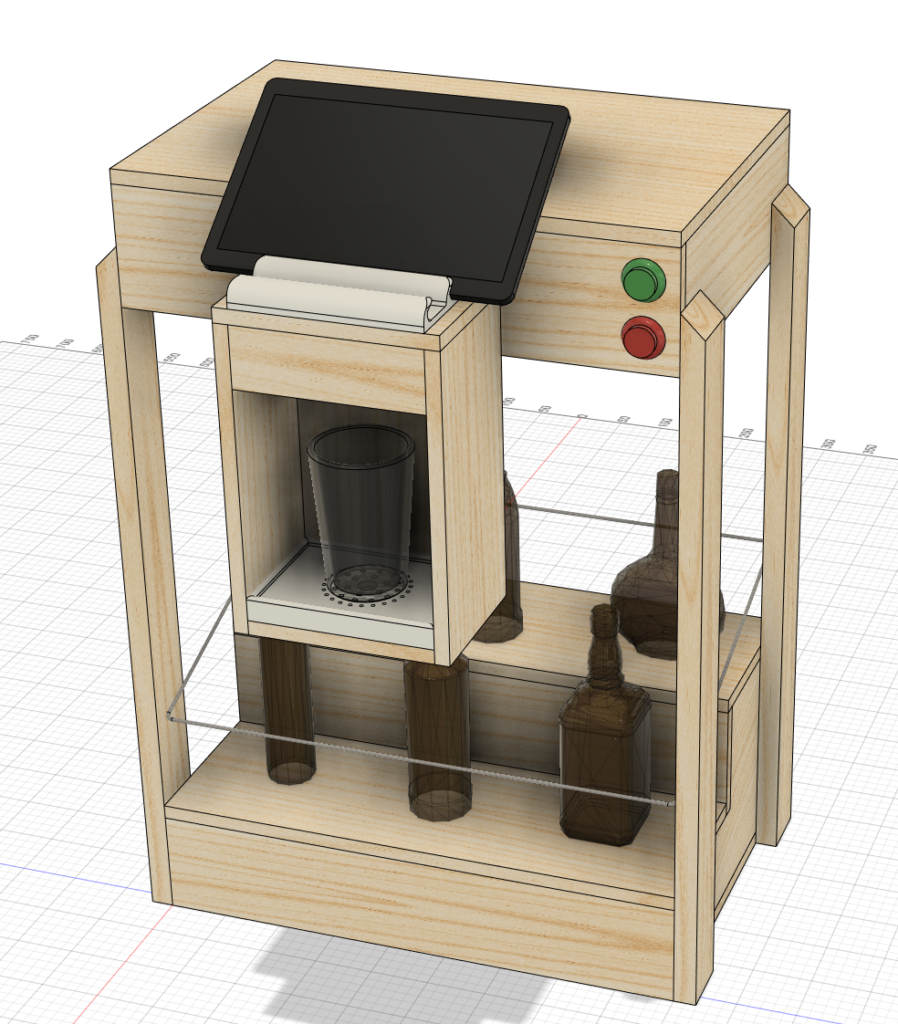
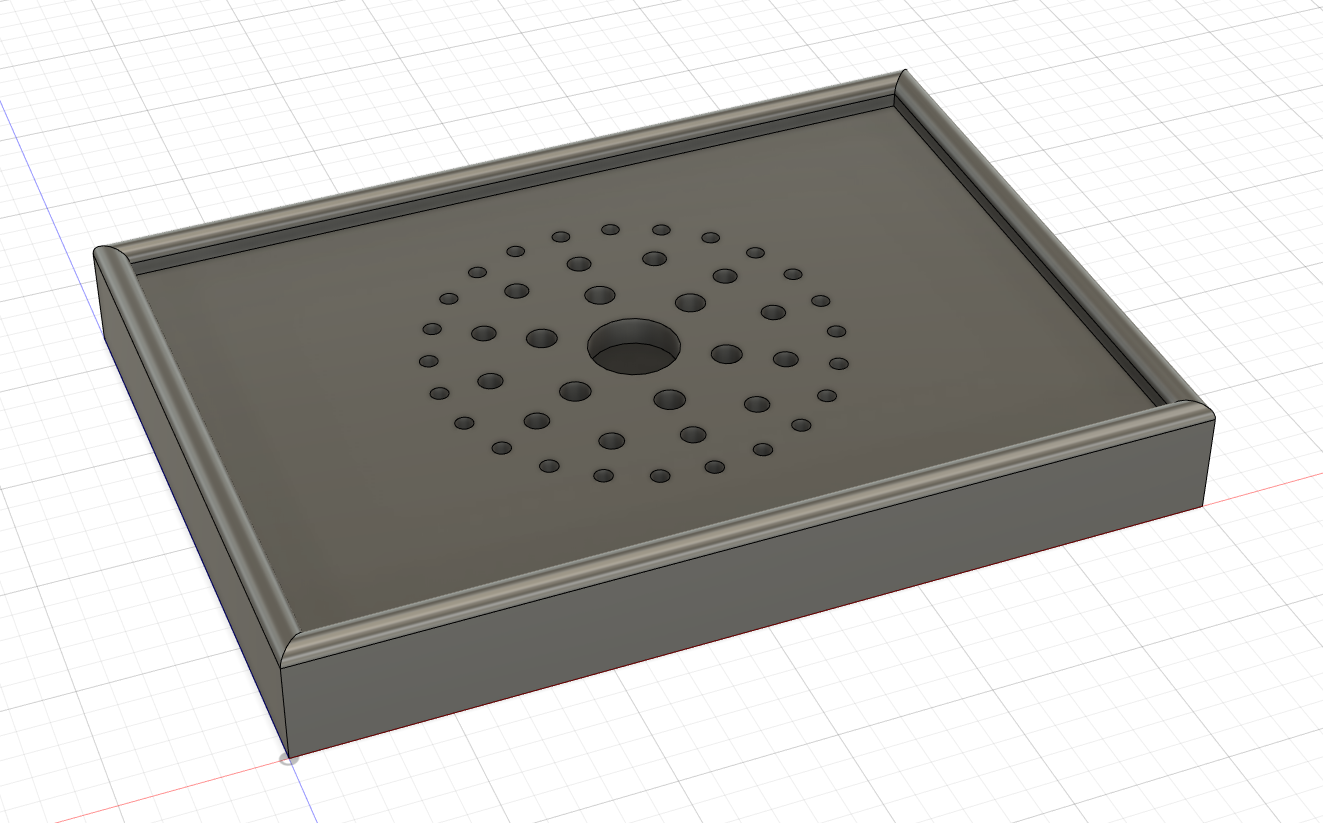
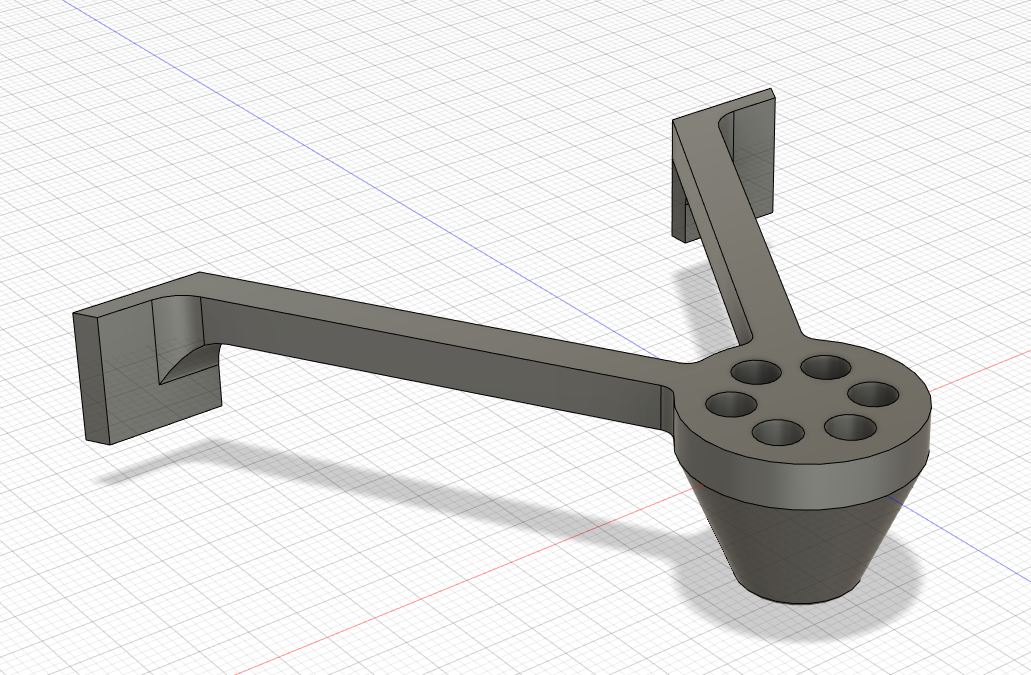
The body of the machine is made of 1/2″ plywood. The tablet holder, drip catcher, and nozzle are 3D printed out of food-safe PLA.
Parts List:
- Main Body
- 1 sheet of 1/2″ plywood
- 8′ of 1″x2″ lumber
- wood glue and brad nails
- primer, paint, and polyurethane finish
- Electronics
- Misc
- 3mm inner diameter silicon tubing
- rope & eyelets for railing
- anti-skid rubber feet
Assembly
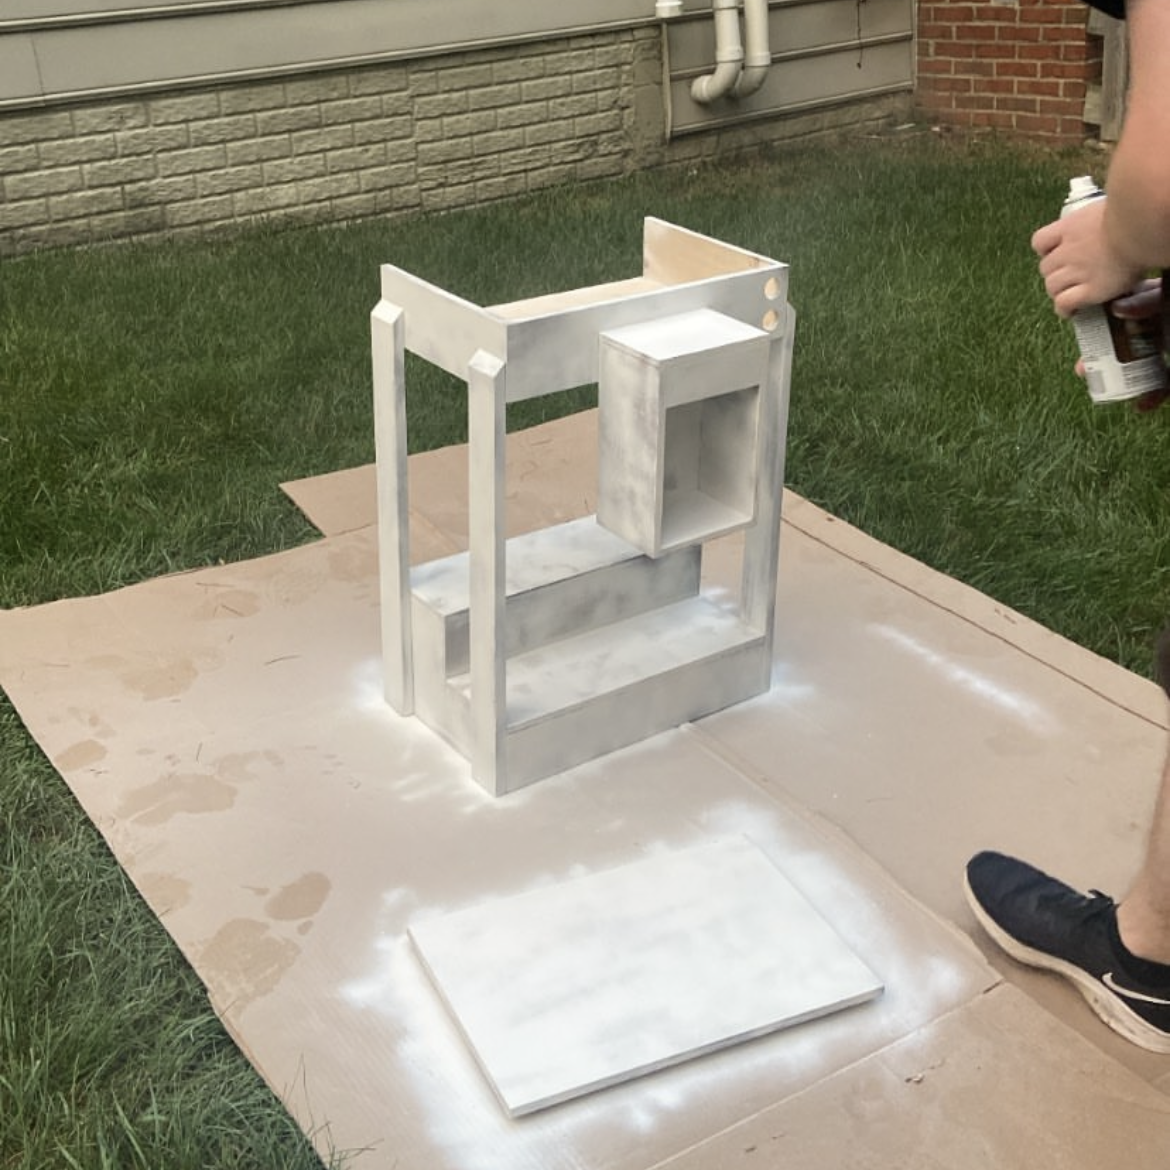
We cut all the wooden pieces to size using a radial saw, miter saw, and jig saw. They were assembled using wood glue and brad nails. The brads mainly serve to hold the wooden pieces together while the glue dries. The large button holes were drilled with forstner bits in a drill press.
The main body was then sanded, primed, painted, and given a few coats of protective polyurethane.
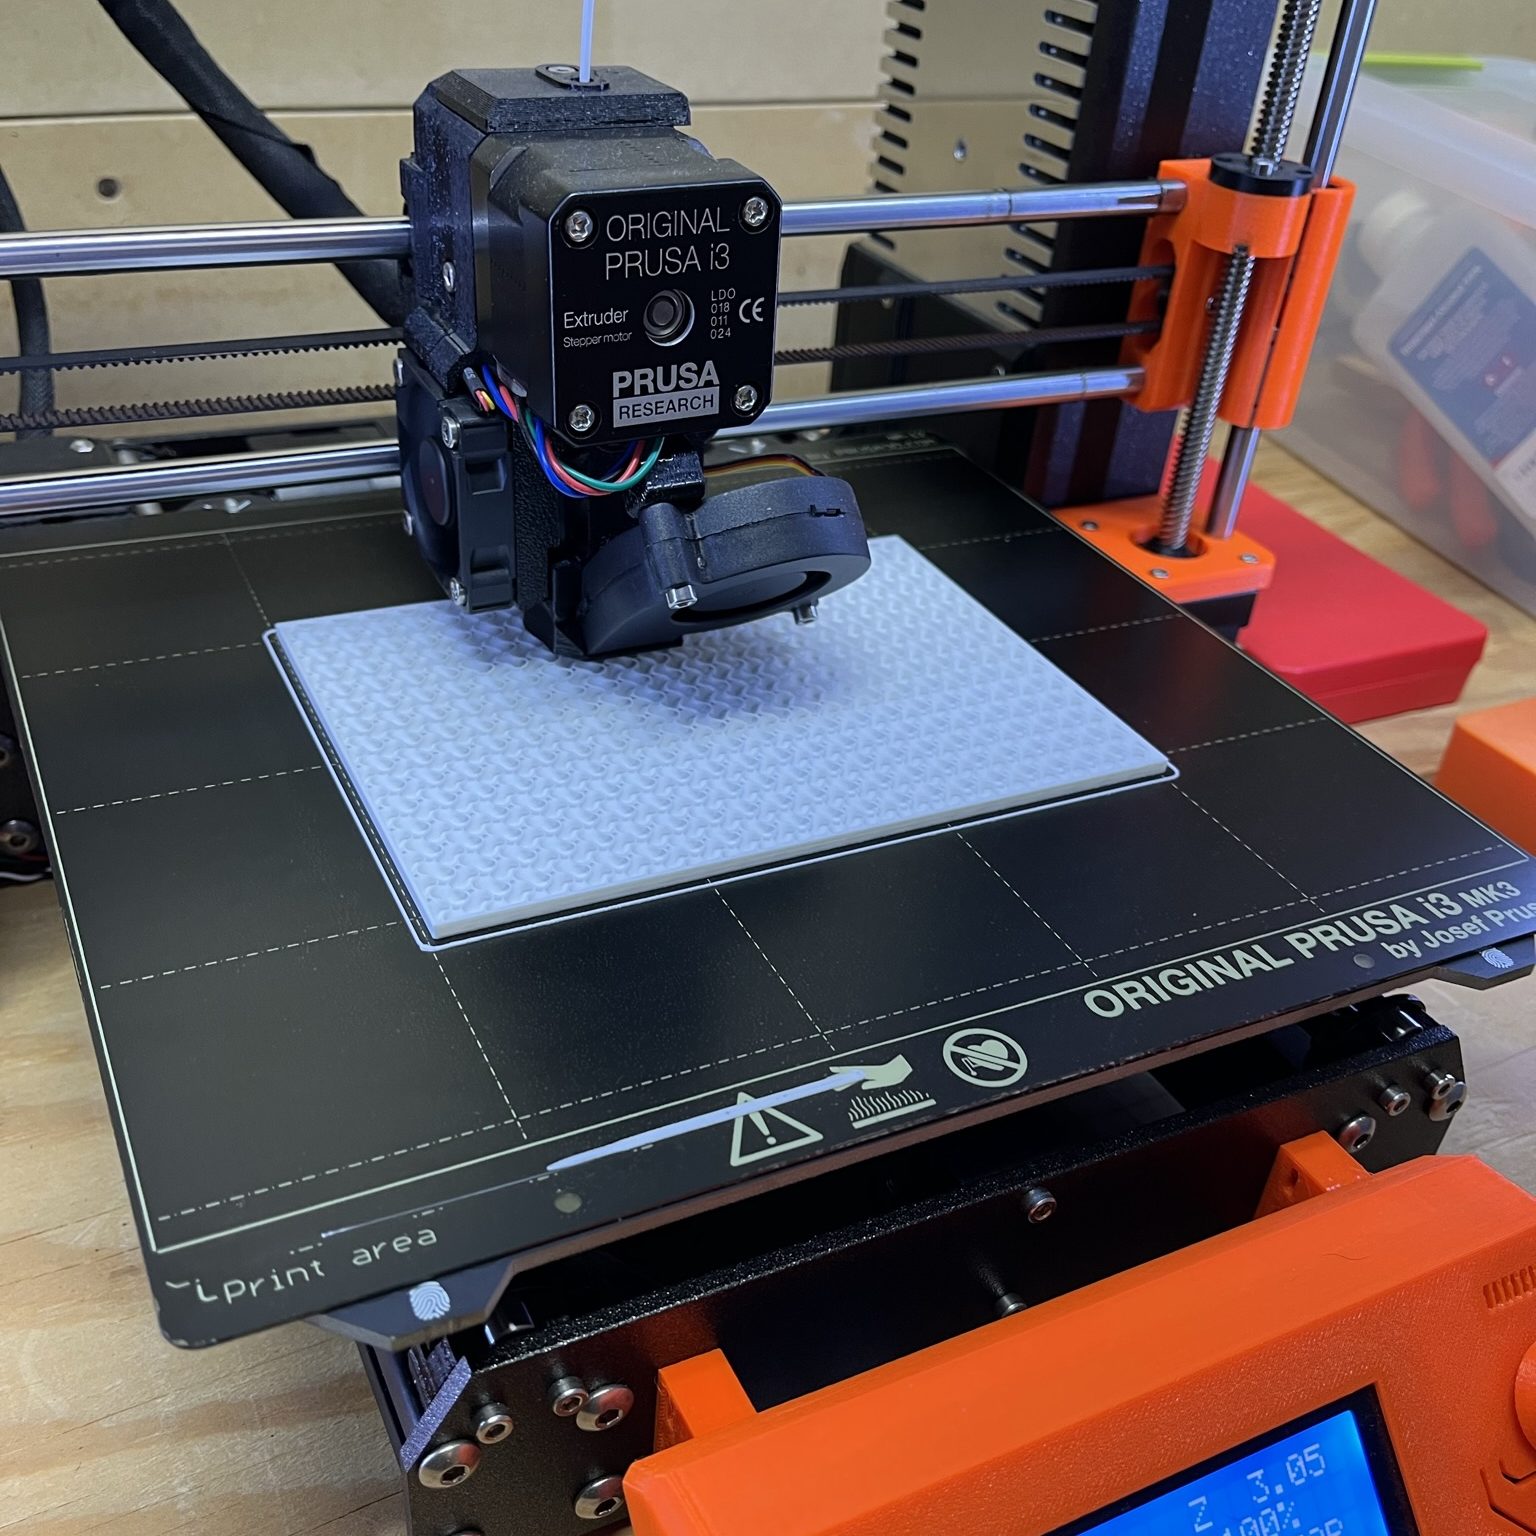
The plastic parts were printed on a Prusa i3 MK3S. The drip catcher was printed in two pieces (tray and plate) which were then fitted together.
Electronics
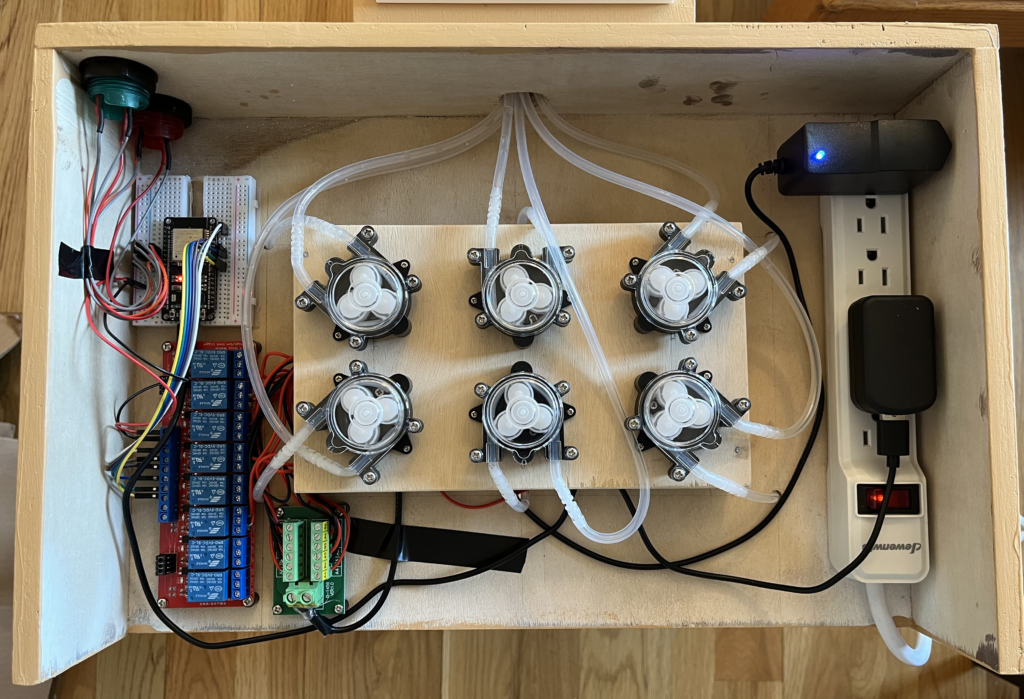
The brains of the operation is an ESP32 module (top left) which was chosen for its low power consumption, abundance of GPIO pins, and onboard Bluetooth. The ESP32 is connected to a 5V relay board (bottom left) which serves to switch the pumps on and off. The pumps are powered by a 6V power supply (top right). A block distribution terminal (bottom middle-left) splits the incoming power to the 6 independent loads. Each pump draws in the neighborhood of 250mA. The red and green buttons (and their onboard LEDs) and also connected directly to the ESP32 via GPIO.
Frontend: Kiosk App
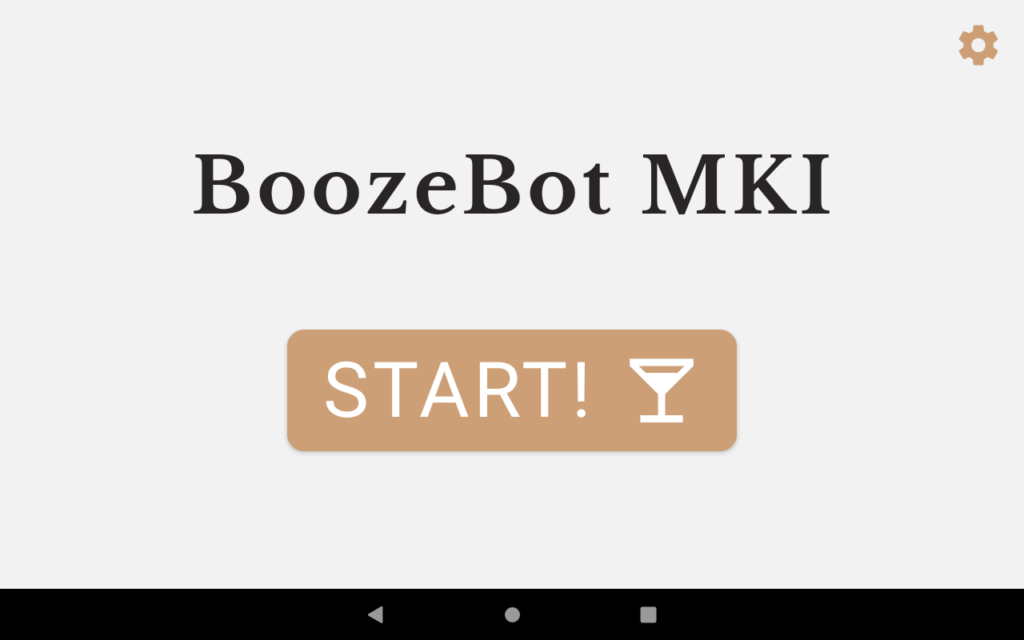
The android kiosk app was developed using React Native and TypeScript. It serves as the primary user interface and consists of the following screens:
- Home Screen
- Menu Screen
- Progress Screen
- Ingredients Config & Manual Pump Control
- Bluetooth Settings
The tablet has a small database of cocktail recipes. A recipe consists of a list of ingredients with associated “parts” as well as some metadata. For example:
{
	name: "Cosmopolitan",
	ingredients: [
		[INGREDIENTS.vodka, 4],
		[INGREDIENTS.cranberry_juice, 3],
		[INGREDIENTS.lime_juice, 1.5],
		[INGREDIENTS.triple_sec, 1.5]
	],
	recommendedSize: "medium"
}
{
name: "Cuba Libre",
ingredients: [
[INGREDIENTS.cola, 6],
[INGREDIENTS.white_rum, 2.5],
[INGREDIENTS.lime_juice, 0.5]
],
recommendedSize: null
},
The user enters the current ingredient configuration via the settings page by telling the app which ingredient is installed in each of the six “slots”. The menu screen then displays all cocktails that it is capable of making with those ingredients.
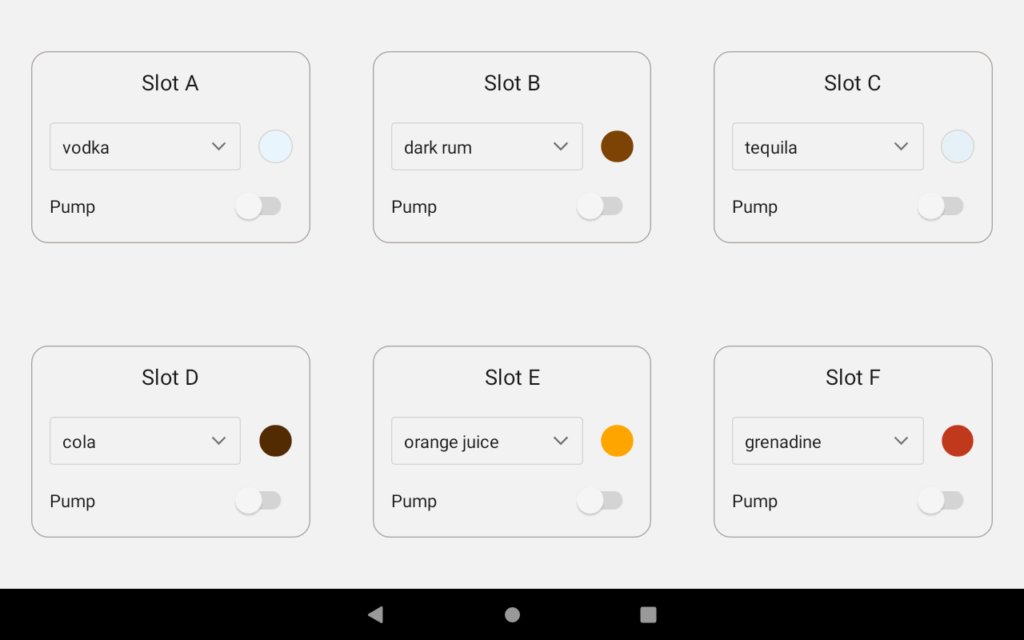
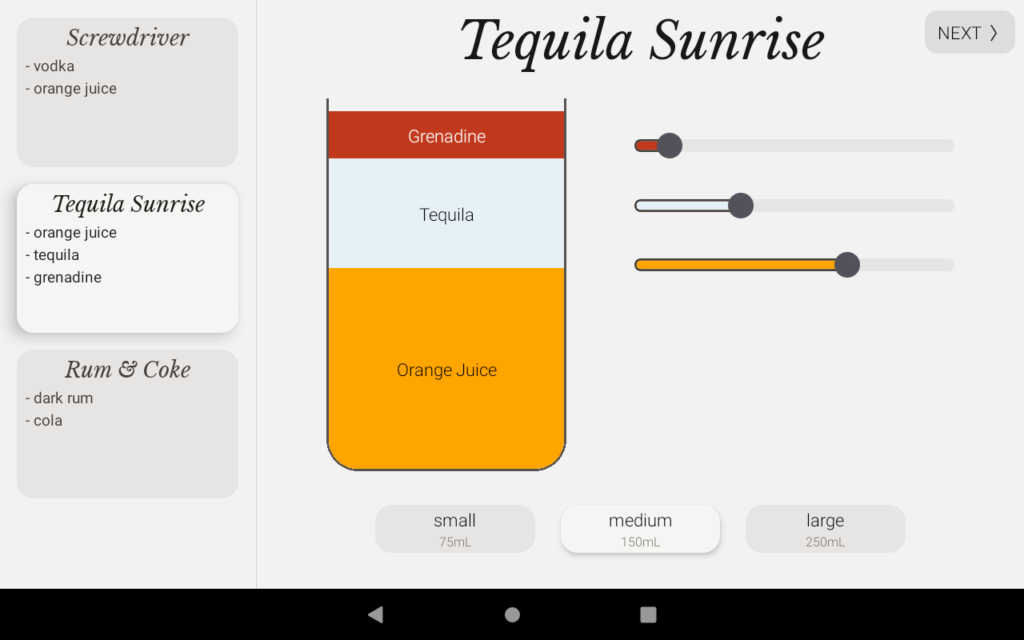
Once the user selects a cocktail from the menu, they have the option to customize the ratios to their liking. They can also select a size (either small, medium, or large).
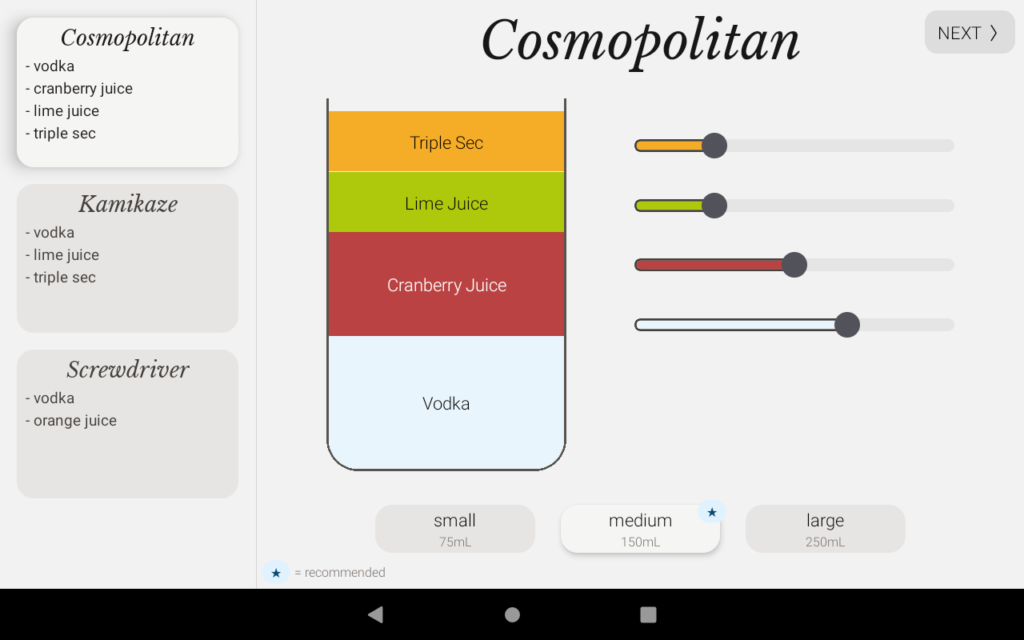
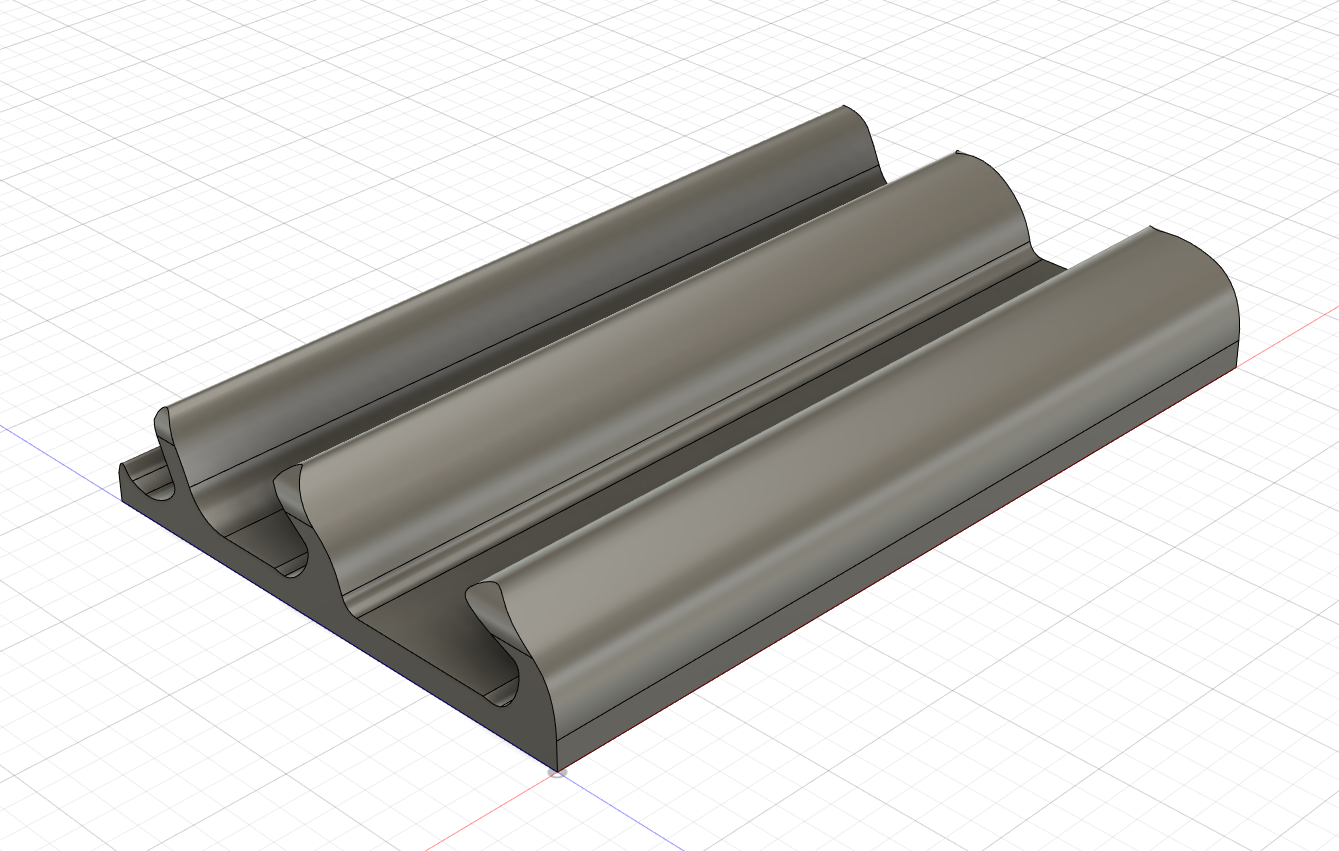
Hitting NEXT > will show the steps to begin dispensing. IKEA-style 3D renders courtesy of Fusion 360 :p
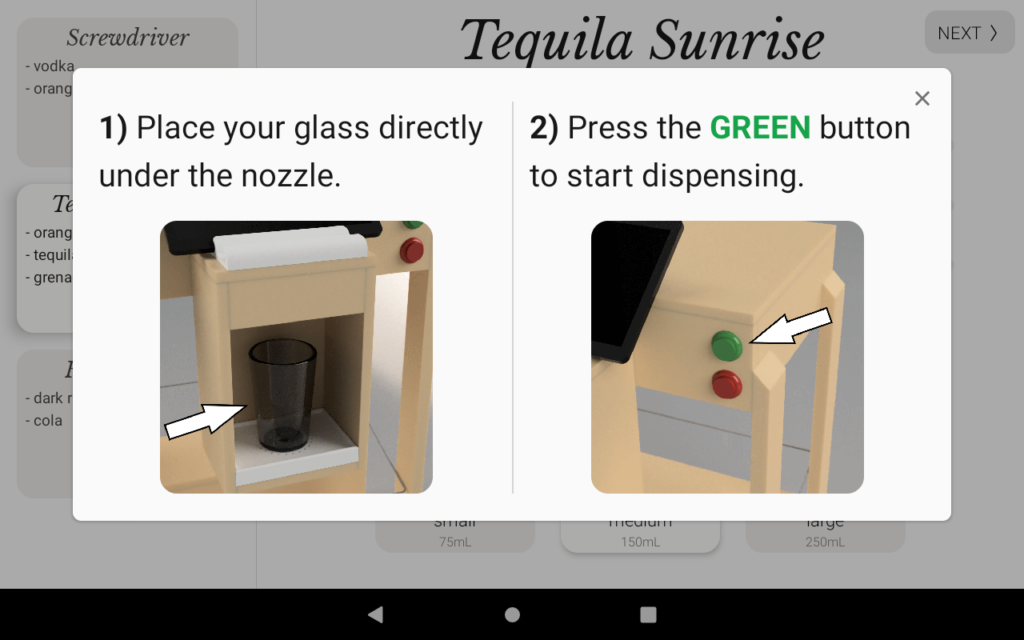
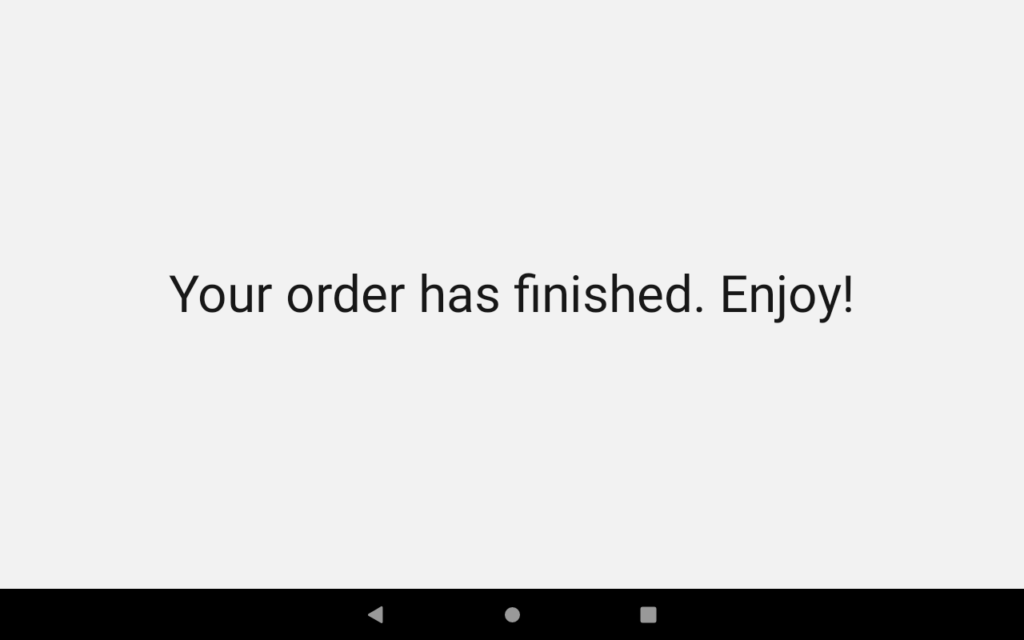
At this point, the frontend and backend start communicating over Bluetooth via a message-passing scheme. Once the tablet receives a request_order_start from the ESP32 (triggered by green button press), it responds with a signal_order_start message containing the required amounts of each ingredient. Upon receipt of the order, the ESP32 will begin dispensing and will send a notify_order_start message. This message, which includes an ETA, instructs the app to display the progress screen and countdown. The ESP32 sends a notify_order_finished message when it has finished dispensing, or a notify_order_canceled message if it is terminated early (via the red button).

Backend: ESP32 Pump Controller
The ESP32 was configured to use the C++ Arduino framework. Its job is to read inputs from the buttons, control button LEDs, control pump relays, and communicate with the tablet. We use the Bluetooth Serial library in conjunction with a basic queue implementation to handle incoming and outgoing messages. We also use the superb ArduinoJSON library to make message serialization/deserialization much easier.
When the pump controller receives a signal_order_start message, it determines how long each pump needs to be run for in order to dispense the correct volume of each ingredient. The pumps run at a roughly constant rate of ~150ml/min, so this computation is straightforward. It runs all the pumps simultaneously and turns them off individually when enough time has passed.
Conclusion
BoozeBot makes pretty good drinks! The UI is intuitive and it is fun to use. More importantly, it’s a big hit at parties 🙂
However, there are some small problems with volumetric precision. Carbonated beverages like coke tend to under-dispense since the gas coming out of solution in the tube displaces some of the liquid. Conversely, highly cohesive liquids like grenadine syrup tend to over-dispense since the peristaltic pumps seem to have an easier time pumping them. The good news is that these errors occur very predictably so it should be possible to account for them in software by including an empirically-measured flow rate for each ingredient (e.g. 150ml/min for water, 90ml/min for coke, 175ml/min for grenadine etc.) in the database.
The only other thing I would change is the choice of app framework. React Native has a very mature community, but the framework has a lot of overhead which makes the app occasionally unresponsive on the budget hardware. Perhaps a native android app would have worked better. Anyways, thanks for reading!
Amazing job!! Well done